HTTPS via CloudFlare for GitHub Pages
2017/08/19

This tutorial assumes that you already have a GitHub site, but if you don’t, Rstudio has published a getting started guide here (which ironically is not being served via https at present). I also want to point out that GitHub pages serves all of it’s content via https by default, as long as you use the stock URL username.github.io. But if you wanted to use a custom domain, you were left out of the security party, until Cloud Flare came to town.
Besides buying the domain, everything you are about to see is free and fast!
Custom domains
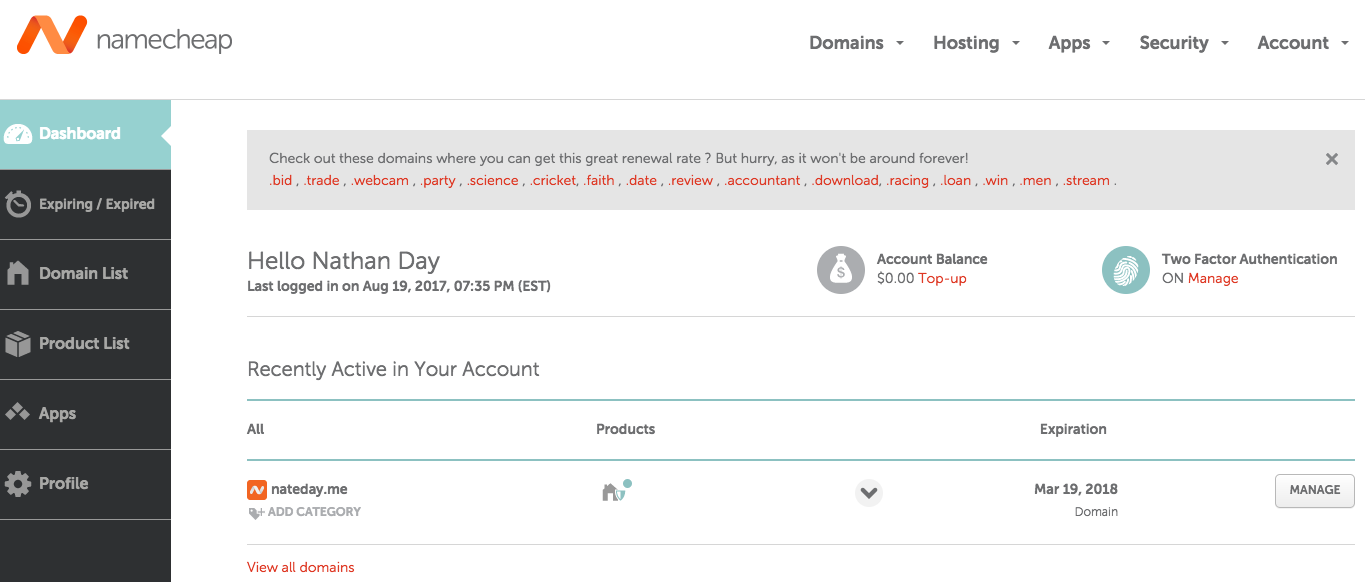
The first step (and only one that costs $$$) is to register a domain with a domain registrar service. There are a lot of companies that do this, I chose to use NameCheap. While this is the first and only DNS I have ever registered, I am impressed with how easy to use NameCheap’s interface is.
The prices for a domain name vary depending on the extension and wording, and you will find roughly equivalent prices across vendors. Typically you will be paying between $2 and $15 for a year long registration.
Once you’ve settled on a good domain for your website, this is by far the most time consuming part I promise :), you can track your currently registered domains on your Dashboard, which can be found in the Account drop down menu.
Update GitHub
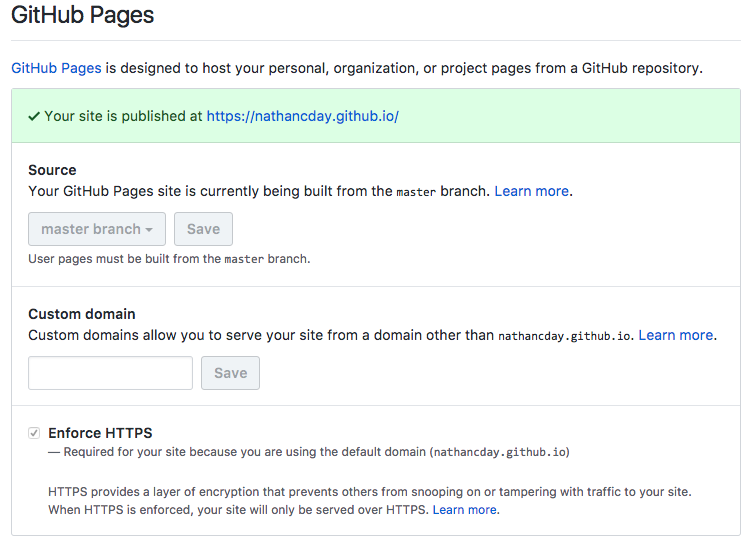
Now that you have an active domain, you can return to your GitHub pages repository and head into the Settings page. In the Options section scroll down to the GitHub Pages block (fourth section down) which should look like very similar to this:
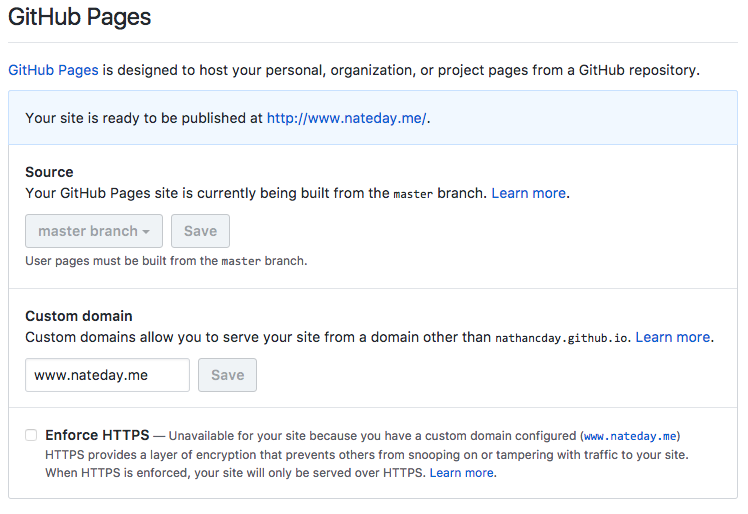
Simply type your new custom domain with the “WWW” prefix into the Custom domain field and click Save. Now the GitHub Pages block should look like this:
Notice that the check box to “Enforce HTTPS” has become grayed out and a message let’s us know it is “unavailable for your site because you have a custom domain configured”. Now let’s click on our new custom URL and be whisked away to our fancy new internet address.
Note: As soon as you click Save, to either add or remove a custom domain, GitHub will automatically make a commit adding or removing a file called “CNAME”. This is just the method GitHub uses for detecting where to forward any incoming web traffic and you should really never edit this file by hand.
Security with https
While your new URL will work, you may be met with a scary warning message by your browser when you first try to visit. Perhaps something like this:
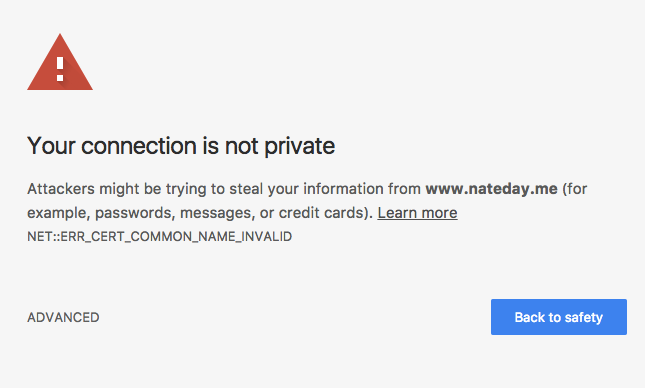
Yikes! That’s not a nice way to great people and your visitor with be reminted by this nasty red unsecured prefix in their browser’s address bar for the duration of their stay, not a good look!

On top of the bad security vibes your site is sending out, you are also taking a perfomance hit in terms of SEO. Since Google is a big HTTPS believer and whether or not a site is served securely with HTTPS is now being factored into their page ranking algorithms.
To sum it up, HTTPS is the future of the web. So even though your site may not be transmitting sensitive user information (like credit cards or addresses) it is still good practice to use an encrypted connection.
Set up CloudFlare
Fortunately, CloudFlare is here to lead us into HTTPS safety, so let’s head on over there and create an account. Once you’re logged in, you will be dropped onto this page:
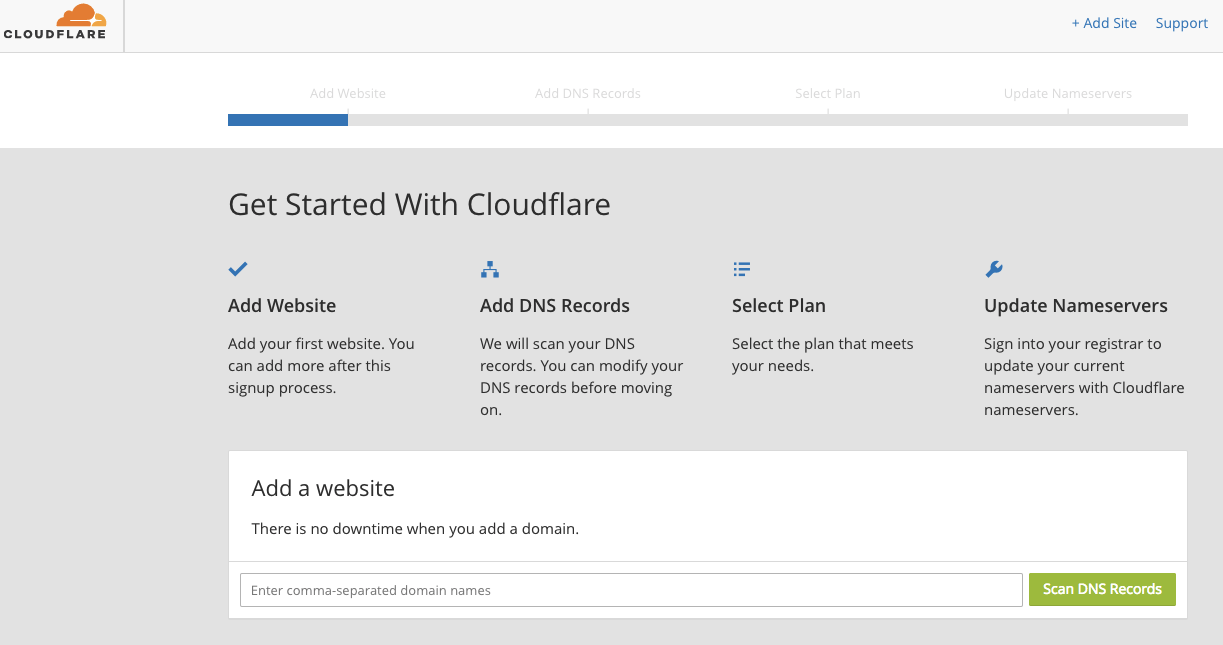
Just type your bare domain “nateday.me” into the search bar at the bottom and start your DNS scan. This countdown page will appear for 60 seconds, while Cloud Flare’s code minions comb through your DNS records.
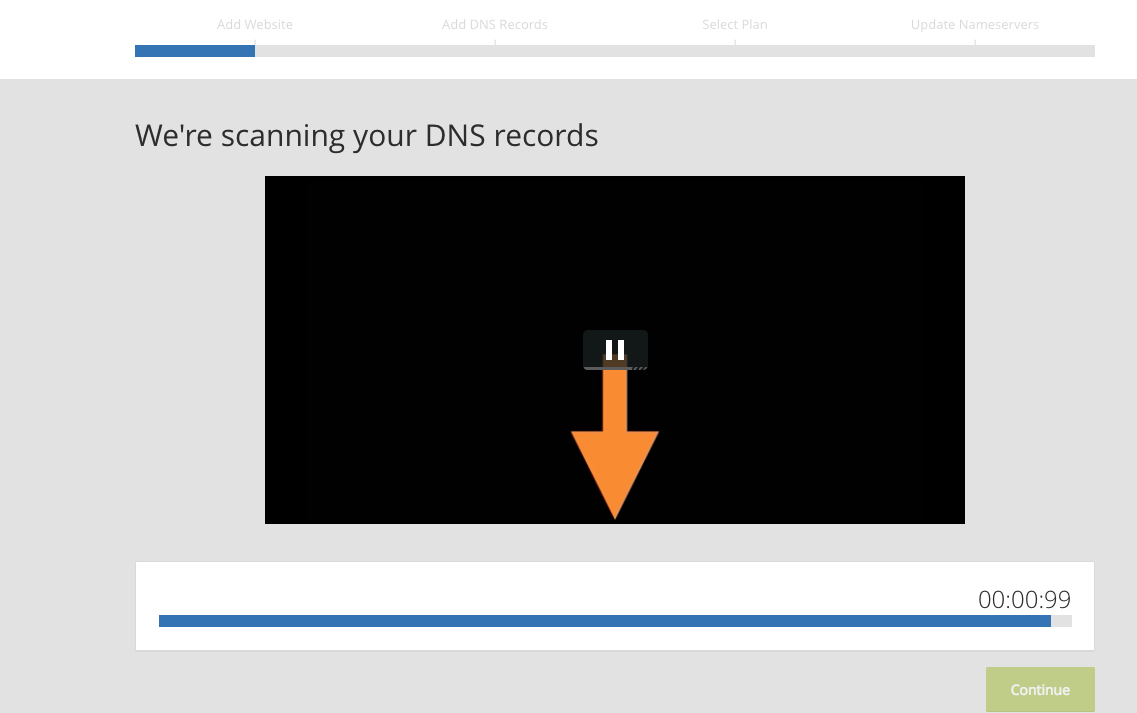
Relax even though the count down time is intense, this is automated, easy and pain free. After the scan is complete, you will be shown a results page similar to this one:
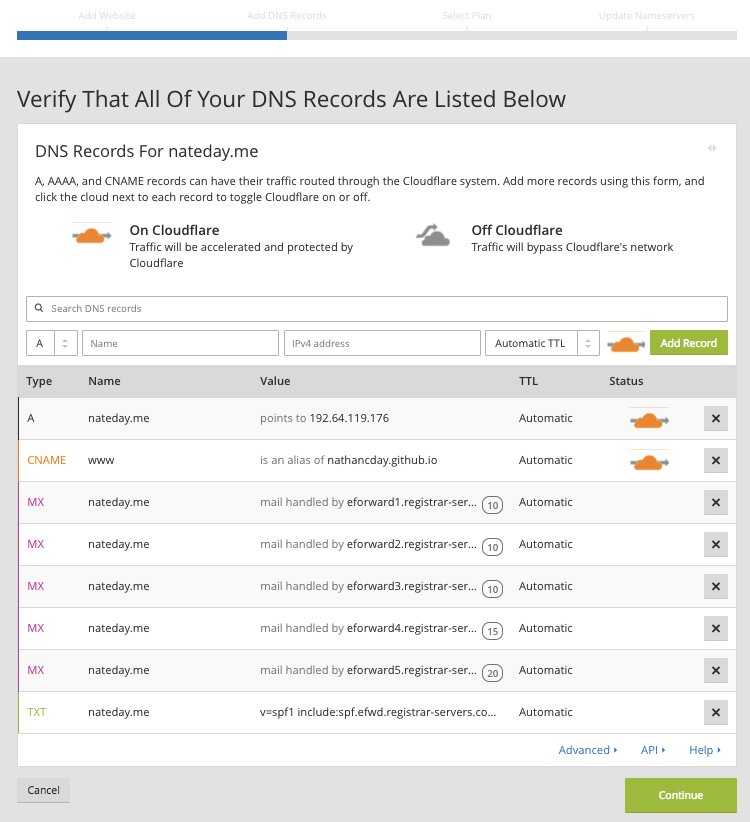
If I was a web developer I could give you the run down of what these difference types are and why they are important, but instead I will simply remind you that CloudFlare are experts in internet traffic security and they know what they are doing. So for starters we are just going with what they think is best clicking “Continue”.
On the next screen CloudFlare will try and up-sell you a paid plan option, but unless you need to handle multiple sites or complex page rules, you can get by with the “Free” option.
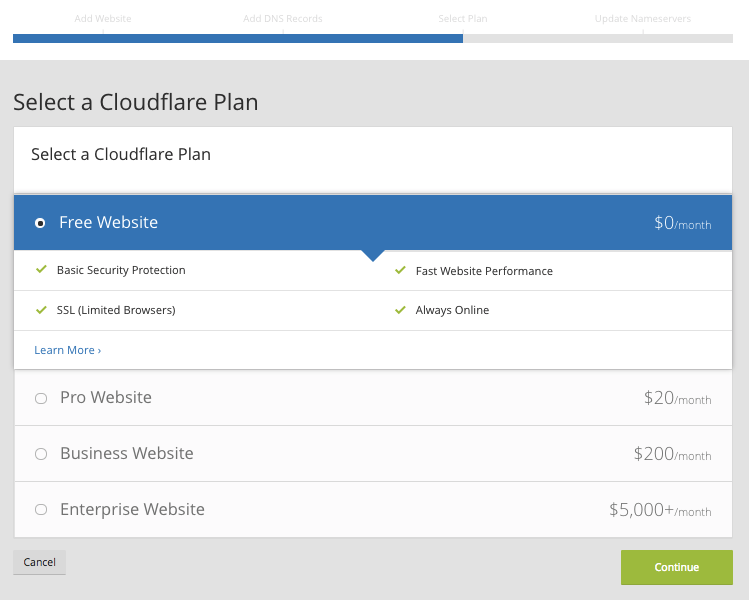
free
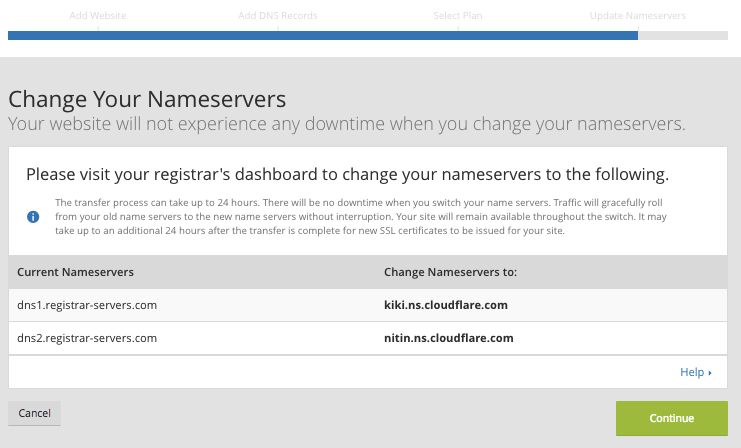
And that’s it! On the wrap up screen, you are instructed to visit your registrar’s dashboard. You are also given two name server addresses to use.
Assign nameservers
Return to Name Cheap (I recommend opening a new tab) and again head into you account Dashboard. Now all you have to do is scroll down to “Nameserves” and select “Custom DNS” from the options. Copy and paste the nameserves addresses you were given by Cloud Flare and click the green check mark to save the information.
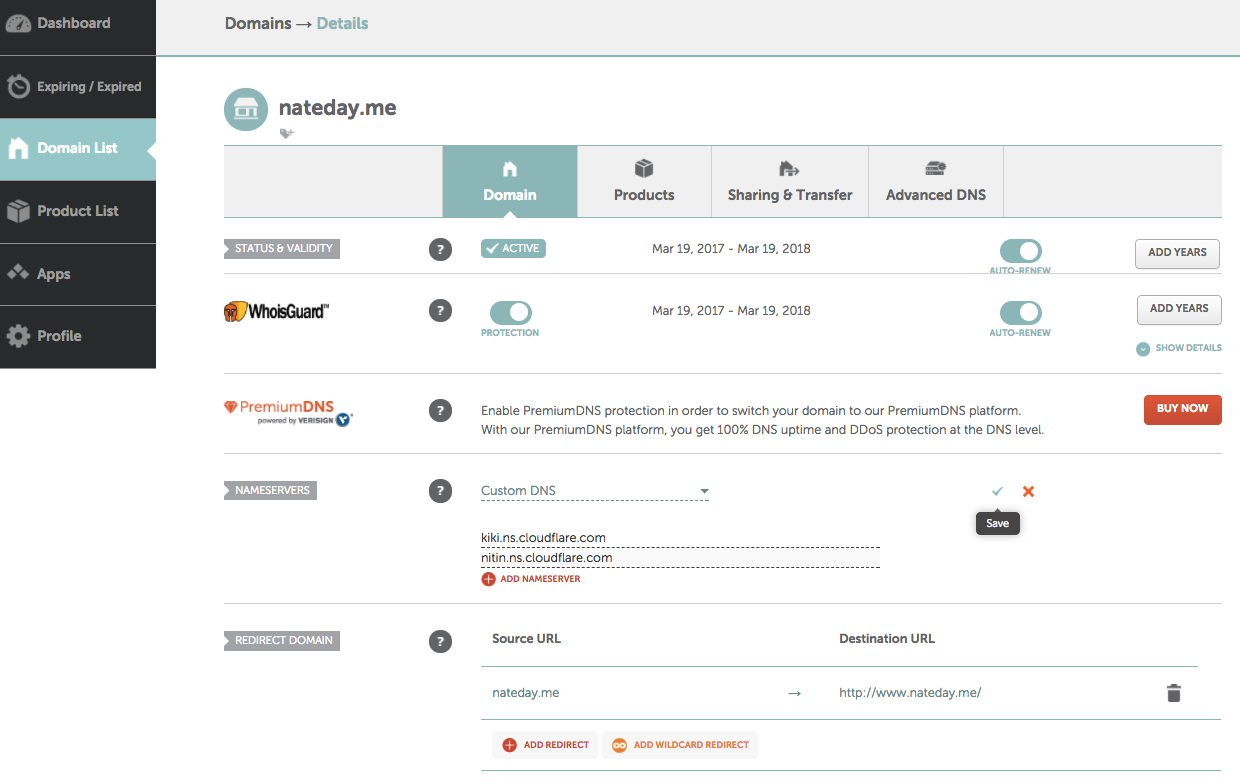
It may take a second or two of the spinning wheel, but you should eventually see a push notification at the top your screen confirming the successful add of you your custom nameserves. The same notification will say it “may take 48 hours to update DNS records”, but it seems to only take a few minutes for me.
Now when you head back into your Cloud Flare Overview, you should be greeted with the following page.
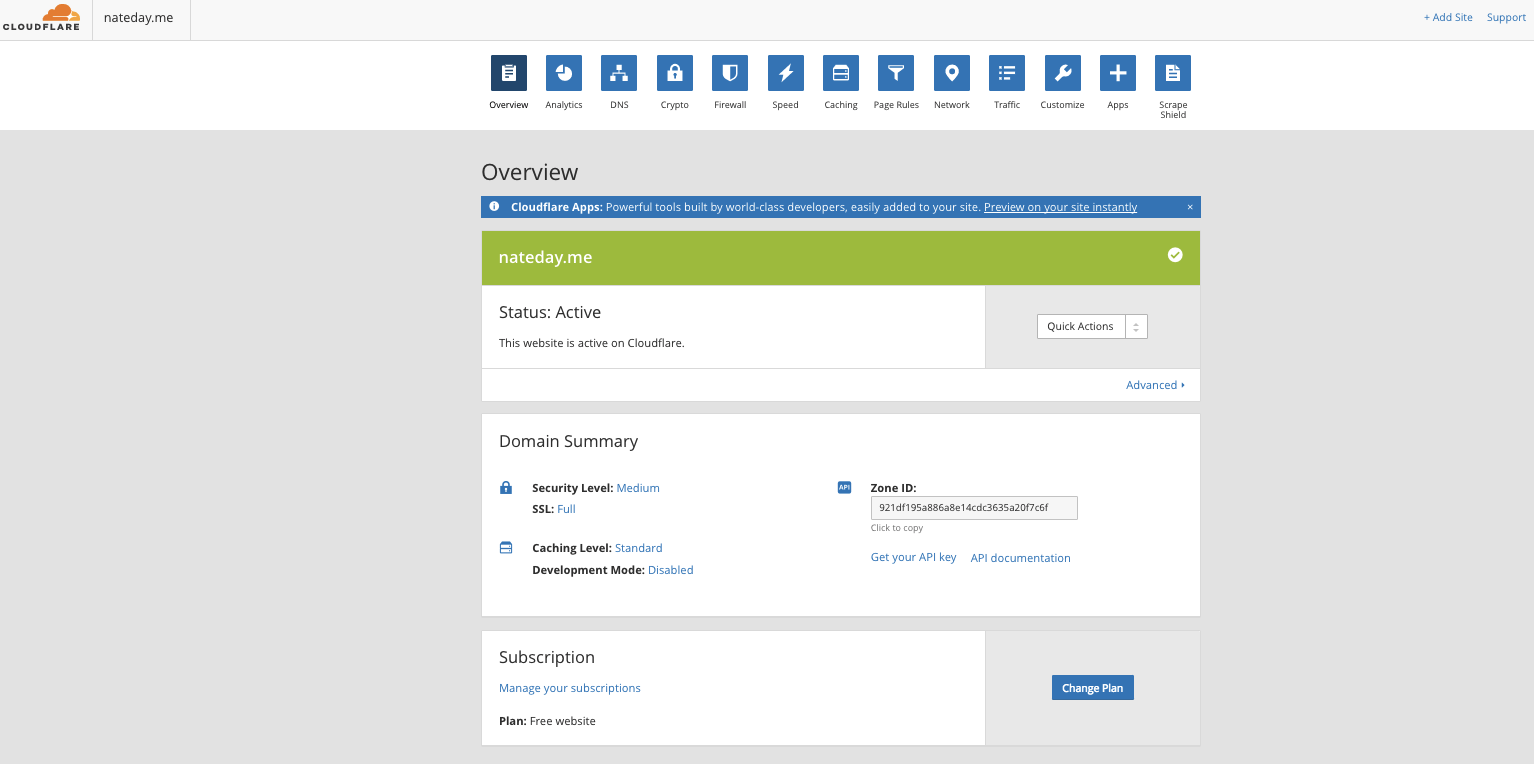
If you don’t see this, make sure you updated your custom nameservers on Name Cheap, it’s easy to forget to click that little green check mark.
Polish with page rules
The final thing to do is create two “Page Rules”. Cloud Flare’s own, Juande Ali recommend setting these in his tutorial.
The first rule recommended is:
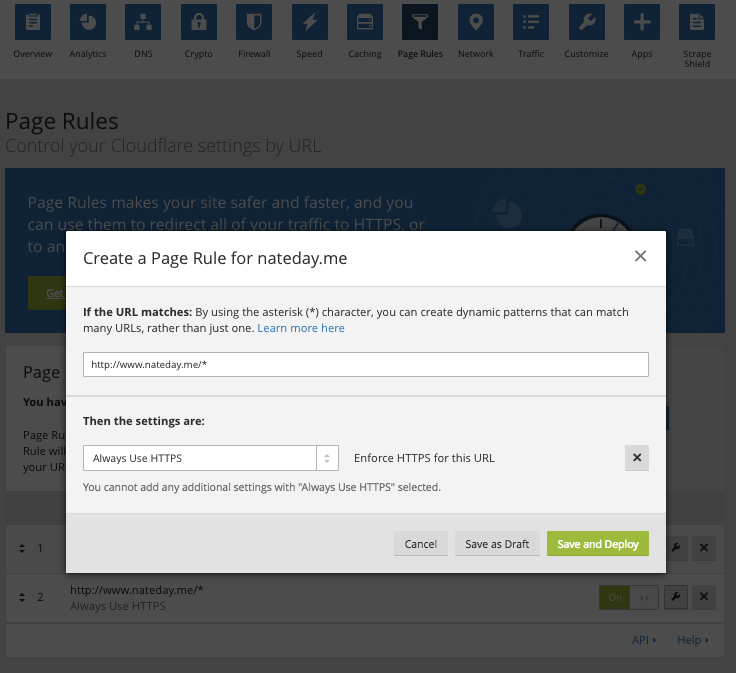
This rule enforces that all content on your site is served via secured HTTPS. Without it, it would be possible for a page in your site to be served via unsecured traditional HTTP and that would lead to the safety warnings we encountered earlier.
The second rule is:

This rule is critical if you want people to be able to access your site without always using the “WWW” prefix. And let’s face it most people don’t actually type that out these days. But once you have this rule enforced anyone that tried goes to “nateday.me” will automatically be redirected to “https:://www.nateday.com”.
Well that’s it for this write-up. I hope you enjoy your new secure custom domain webpage. Doesn’t that green lock look good !?!

I’d like to thank Juandre Ali for his very thorough tutorial on how to get up and running with Cloud Flare.
